This is a project that I've wanted to put together for a while, stemming from my deep love and admiration for the Fallout video games. My first love in this series is FO3, but this look from New Vegas is iconic.
Setup
Make myself look as much like the Wanderer wearing NCR Ranger Combat Armor (sans firearms, of course) as possible! This project starts with the mask, getting the optics and the look just right. I would obviously need the eyes to be red and to include night vision, and I'd strongly prefer the Pip Boy to work.
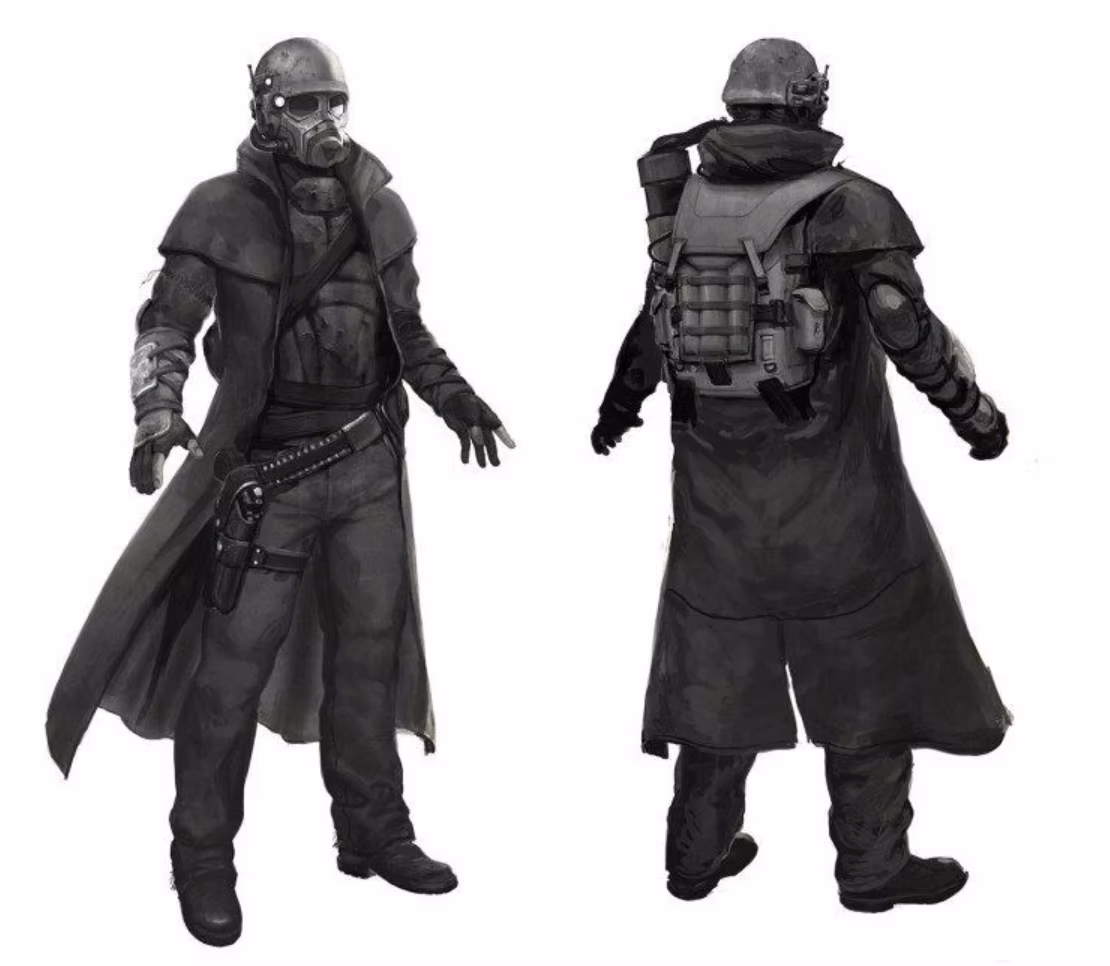
Reference image from the Fallout Wiki - the iconic NCR Ranger look I was aiming for
I really wanted to have something that I could use to actually navigate with, but a higher priority was to integrate lots of sensors all at once, and for "low" cost. The project started out with me knowing nothing about microcontrollers or Micropython/Circuitpython and there were definitely lots of missteps. I am SO grateful I took my time and didn't let any setbacks dissuade me from the end result.
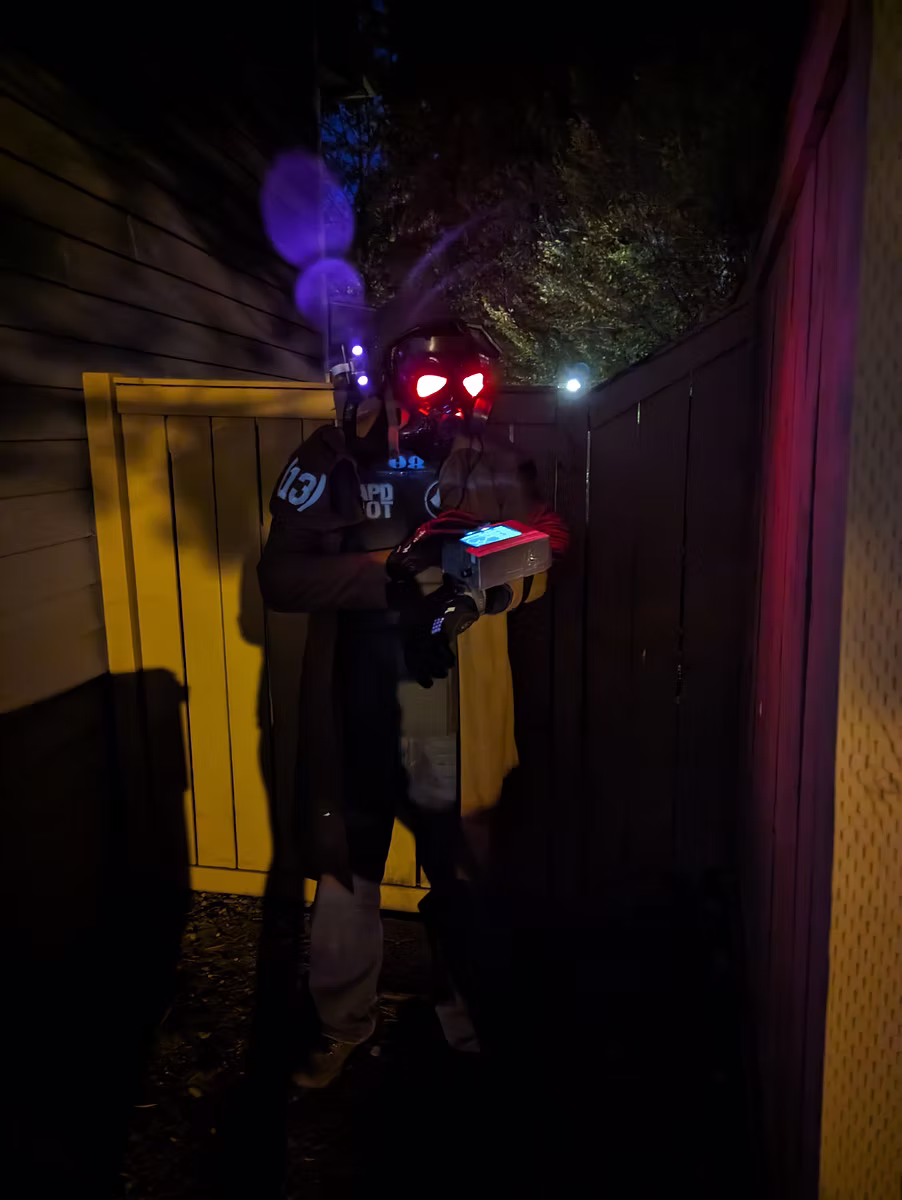
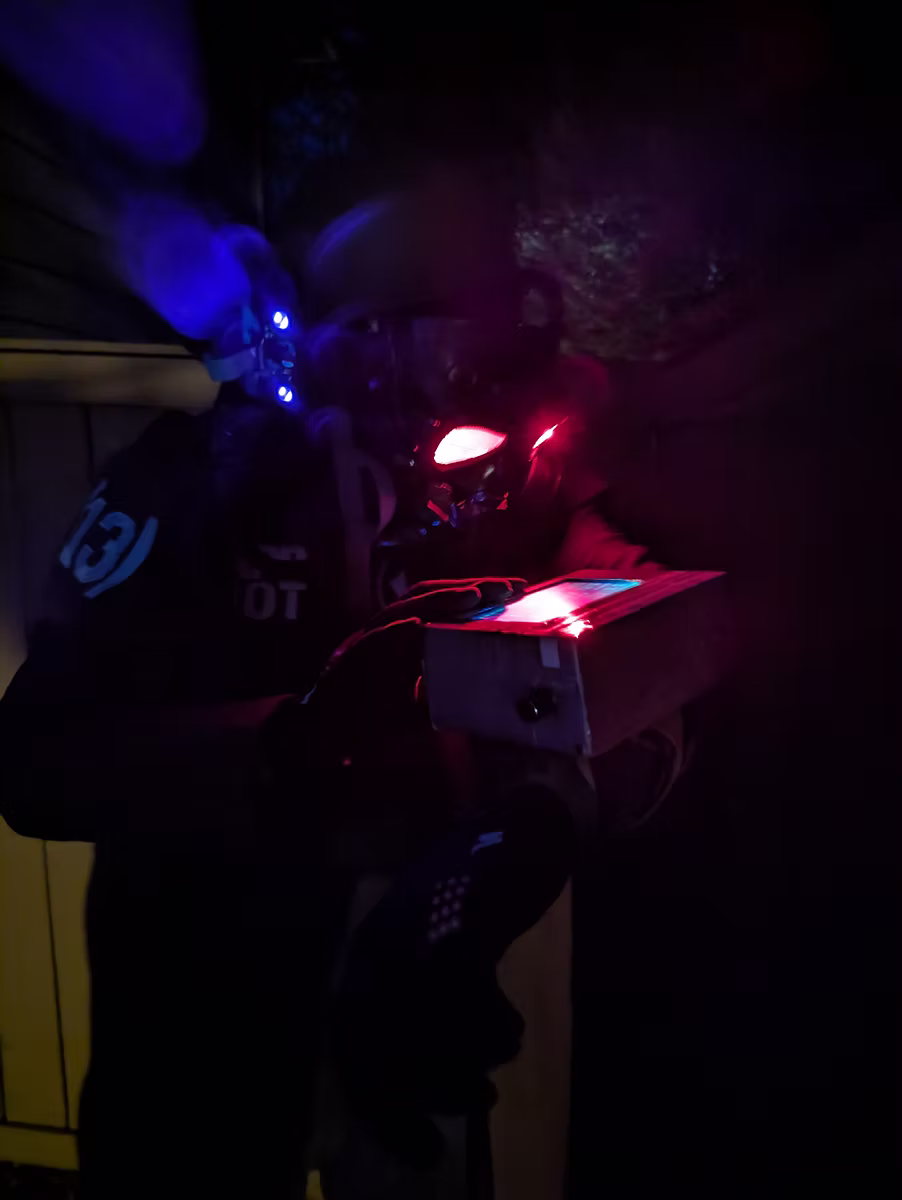
I definitely scared some trick-o-treaters and delighted others...totally worth it! I took my time with this one, working in small chunks over 10 months.
Methodology
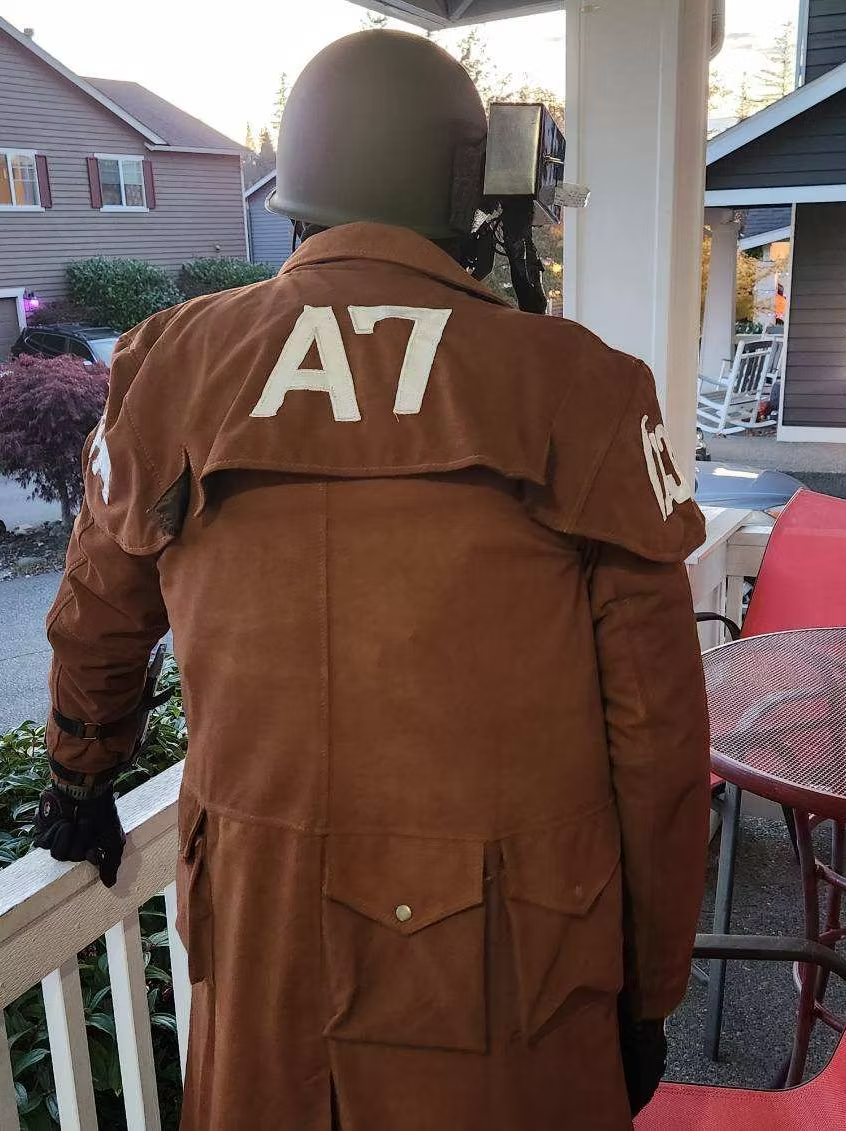
Starting with the mask, I wanted something that looked as much like the reference as possible. I found a cheap mask online that looked similar and had nearly identical eye shape. At the same time, I ordered an official M1 helmet and a duster that fit (I'm 6'6" and this was no small task).
While I waited for those to arrive, I set out to figure out how I was going to "see" with the mask on. I wanted to be able to use this in daylight and at night, so I went down a combination of pathways to find the best fit. Night vision and FPV drone goggles filled my search bar. I decided to use a camera system that would mount to the side of the helmet and project the image to two small screens that I would place in front of my eyes.
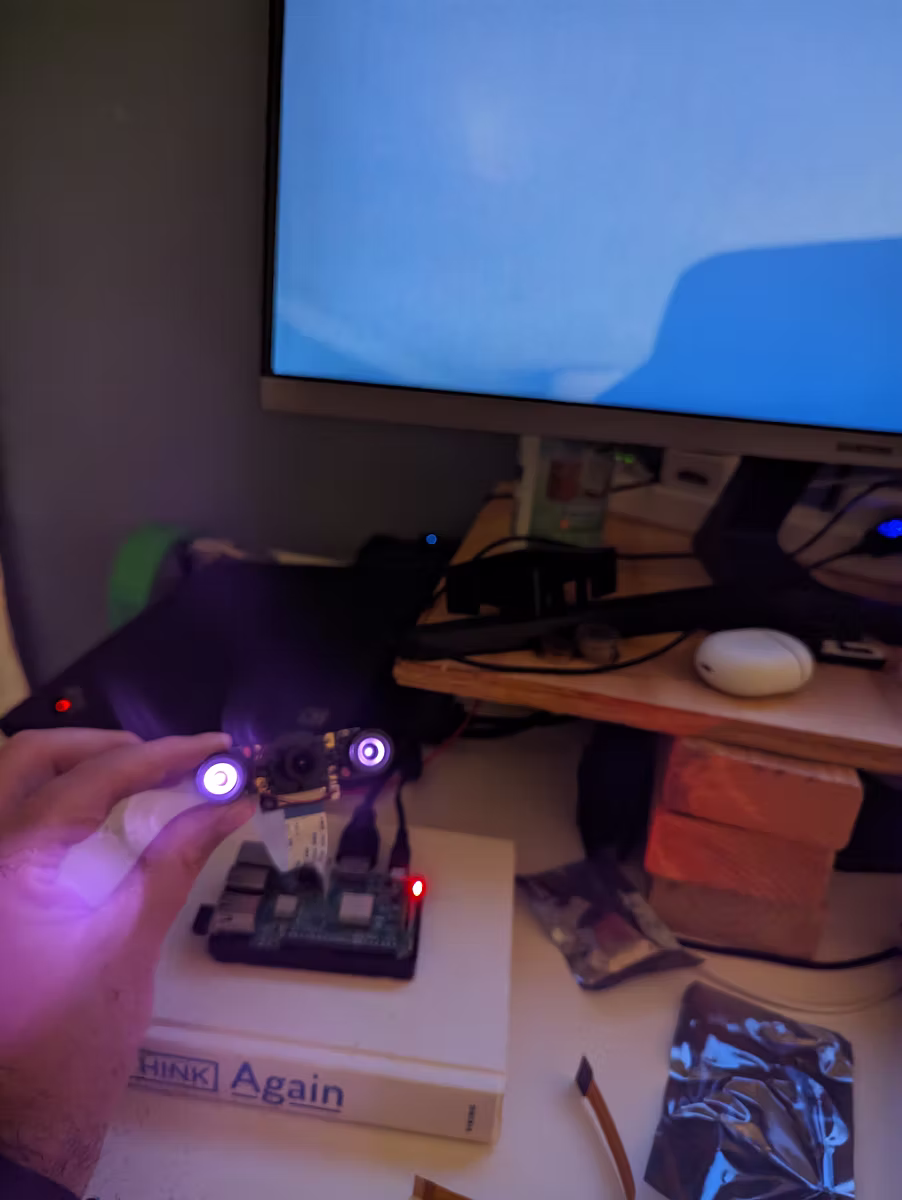
Early proof of concept - getting the Raspberry Pi camera working with night vision
Enter my first mistake. I assumed at this point that I would use my old Raspberry Pi (because it's small, right?) and some other bits to mount on the side. I had hardware and a quick search of how to use the camera port yielded some a quick win. I'm riding high at this point because I have proof of concept going. I just need to figure out optics.
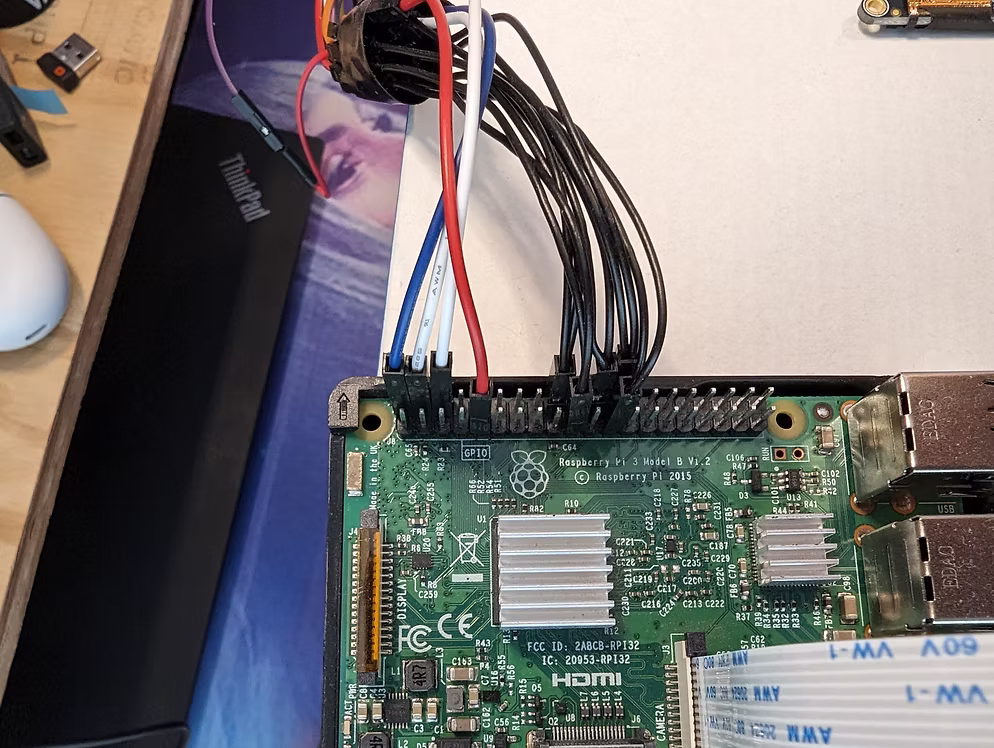
My initial approach with tiny screens and complex wiring
I did a lot of research on the wrong thing and wound up with two versions of some really nice small screens. I imagined wearing some magnifying glasses (readers) and combining that with two screens that I would glue or mount to the inside of the mask eyes. I'm a big fan of RPi because this kind of thing is really accessible to a noob like me.

Testing different lens configurations using a cardboard box to simulate spacing
The bottom of the image is the side of the box where I cut a round hole to look through. The middle of the image is the screen, on and working with the lights dimmed. Between the screen and the hole, you can see one of about 100 different lensing schemes that I tried. That's a Fresnel lens which is great if everything is super still and I have a bunch of room between my eyeball and the screen...which I didn't.
Getting closer with stacked double convex lenses and reader glasses
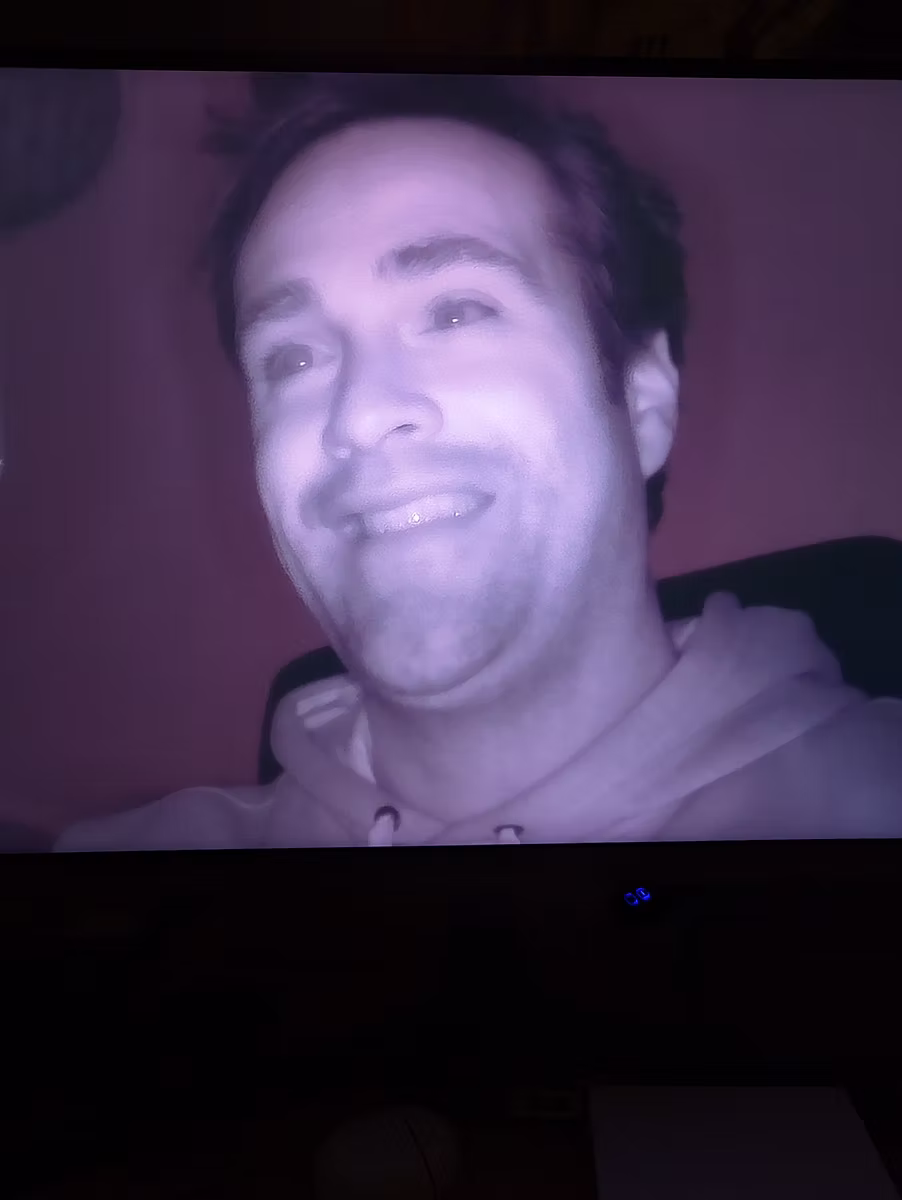
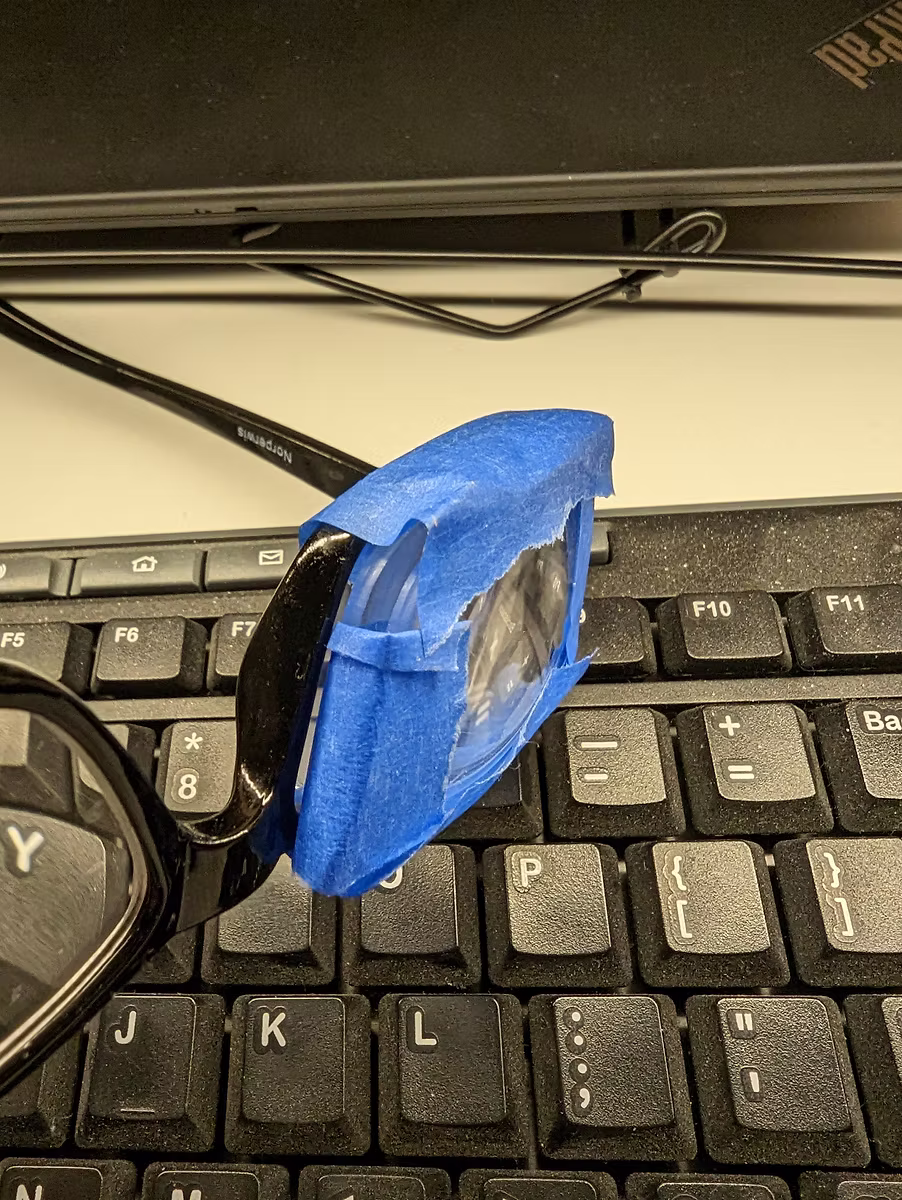
What I didn't understand is exactly how things like Google Glass and other cool products actually work. My screens were enormous compared to what those products had and it wasn't going to be possible to mimic those designs with what I had. It happened that my birthday was right around the corner and I found a killer deal on some AR glasses.
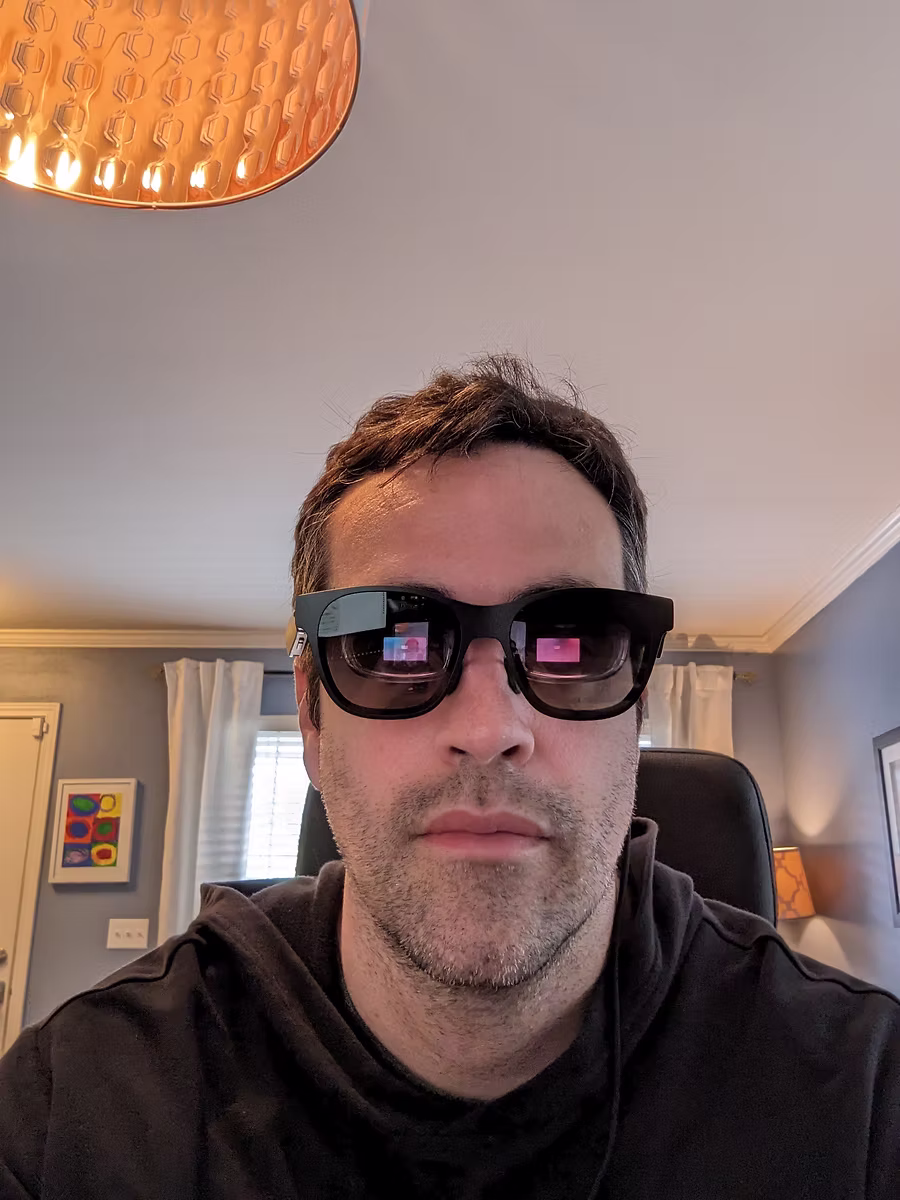
The AR glasses that solved my optics problem - plug-and-play solution
I liked this idea for several reasons: it wasn't crazy expensive (though still pricey), it had an HDMI input, and it would all fit inside my mask with minimal extra padding. My entire lensing issue was now plug-and-play. With a single line of code I turned on the camera and had an image to look at that was super clear.
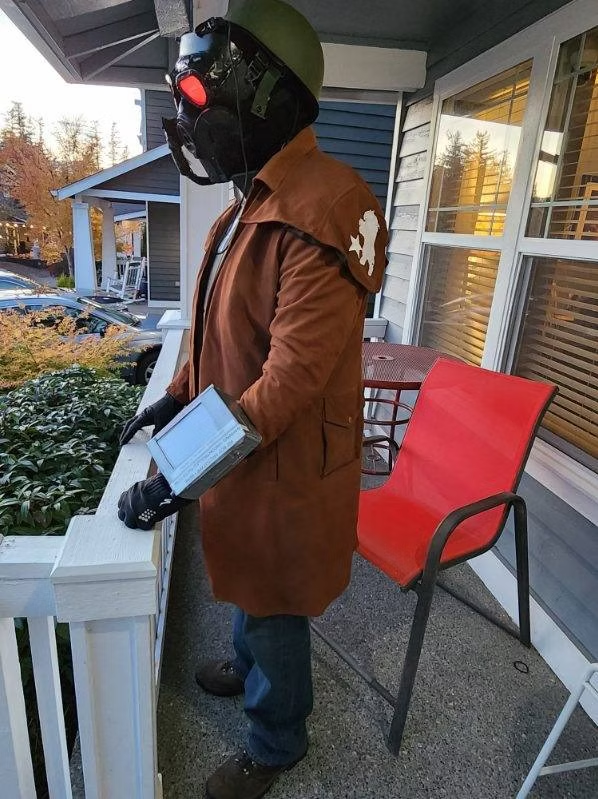
Chest Plate Construction
Next up, the chest piece. I had to look around for some good images of this from the game but landed on the classic style you see on the wiki page. I learned a lot about EVA foam, how thick it should be, how to cut it, and how to give it a shiny, hardened, ready-to-paint finish.
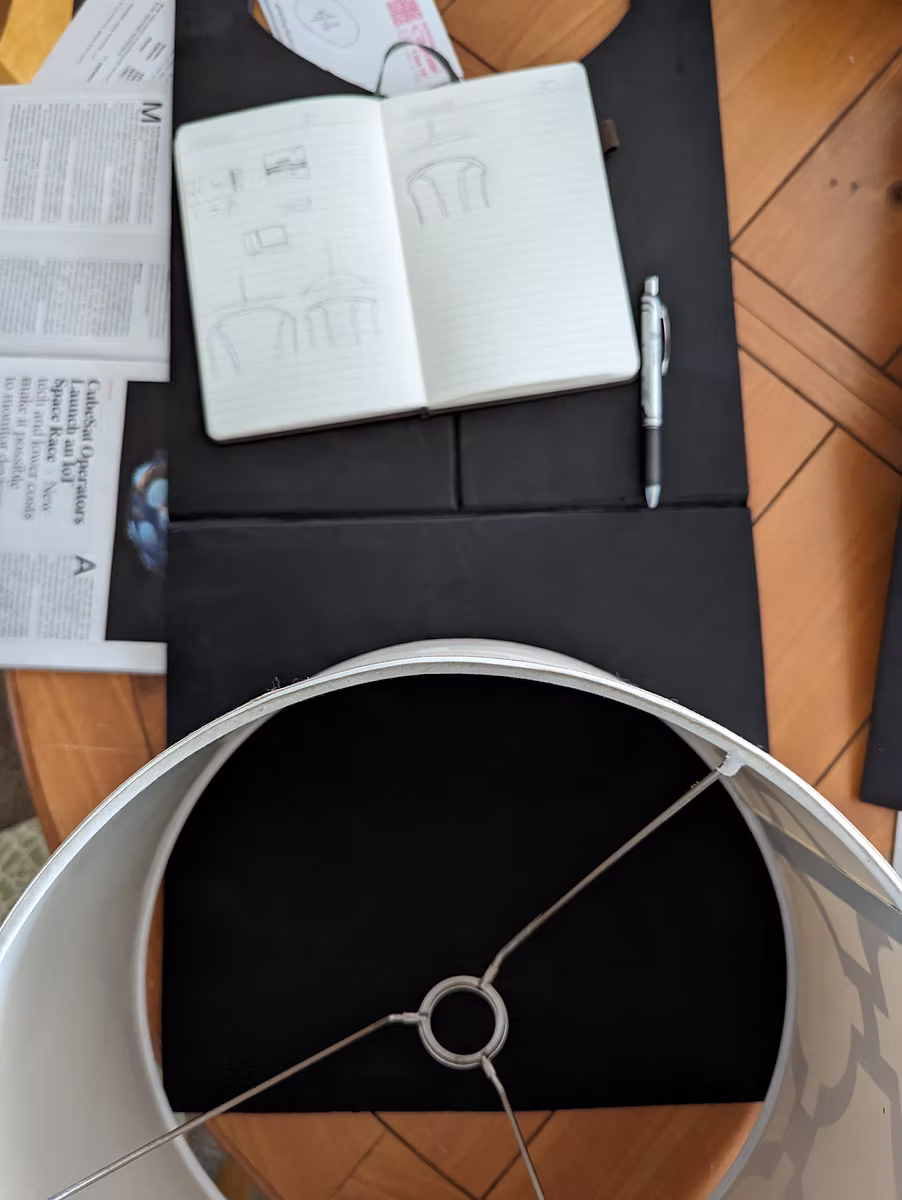
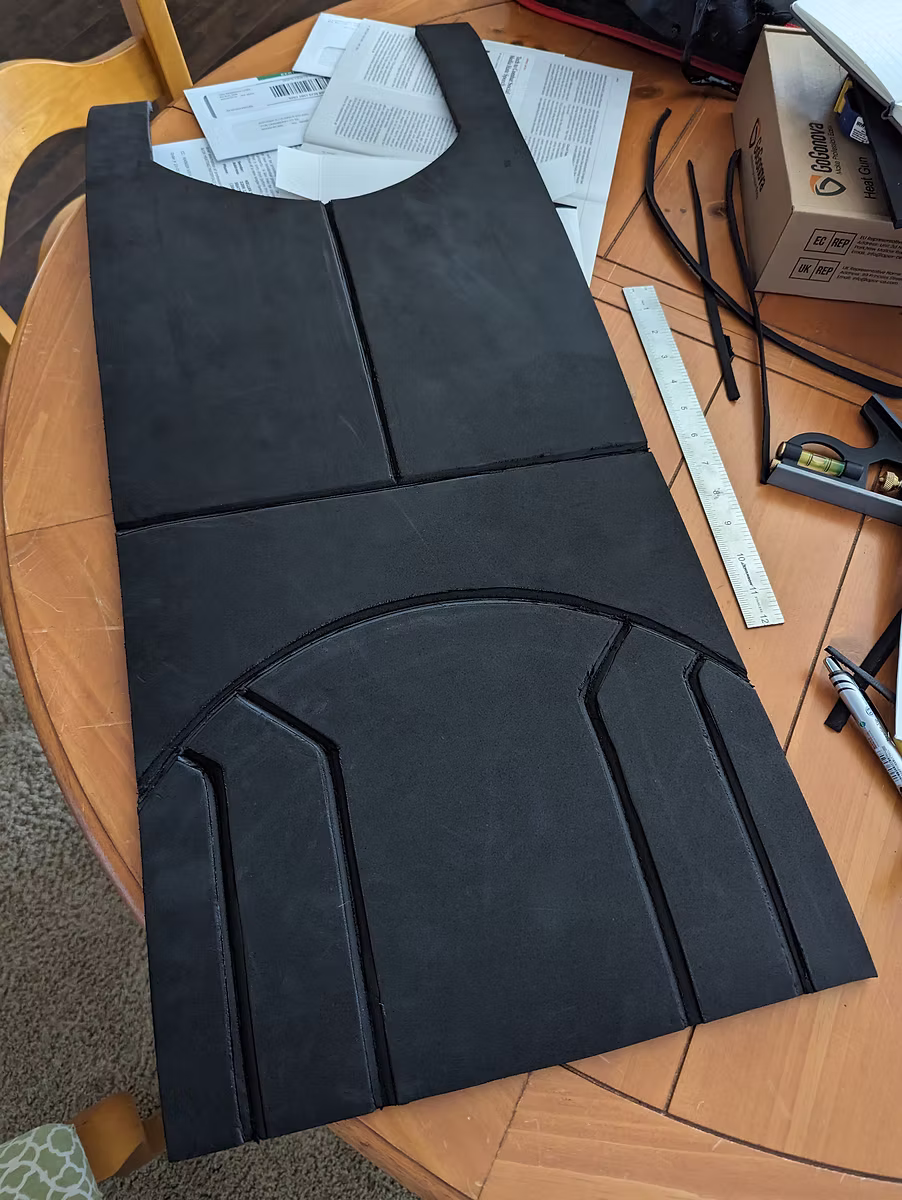
Using a lampshade to get the arc drawn and cut for the chest plate
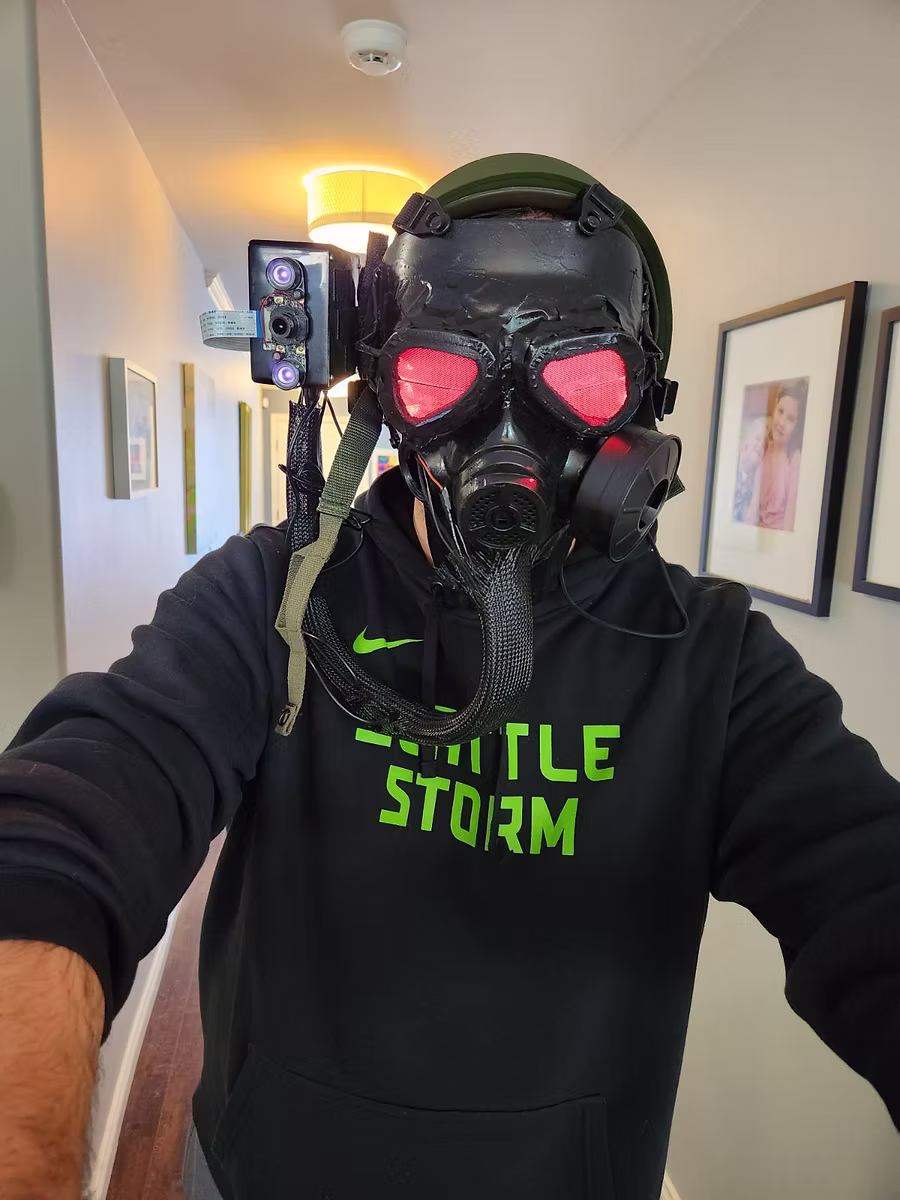
Red Eyes and Mask Fitting
Back to the mask. With the vision system completed, I needed to get serious about how to pad and adjust the thing so that it would sit on my face in concert with my helmet. I also needed red eyes. I found a great product online that is clear and lets light through but also glows red.
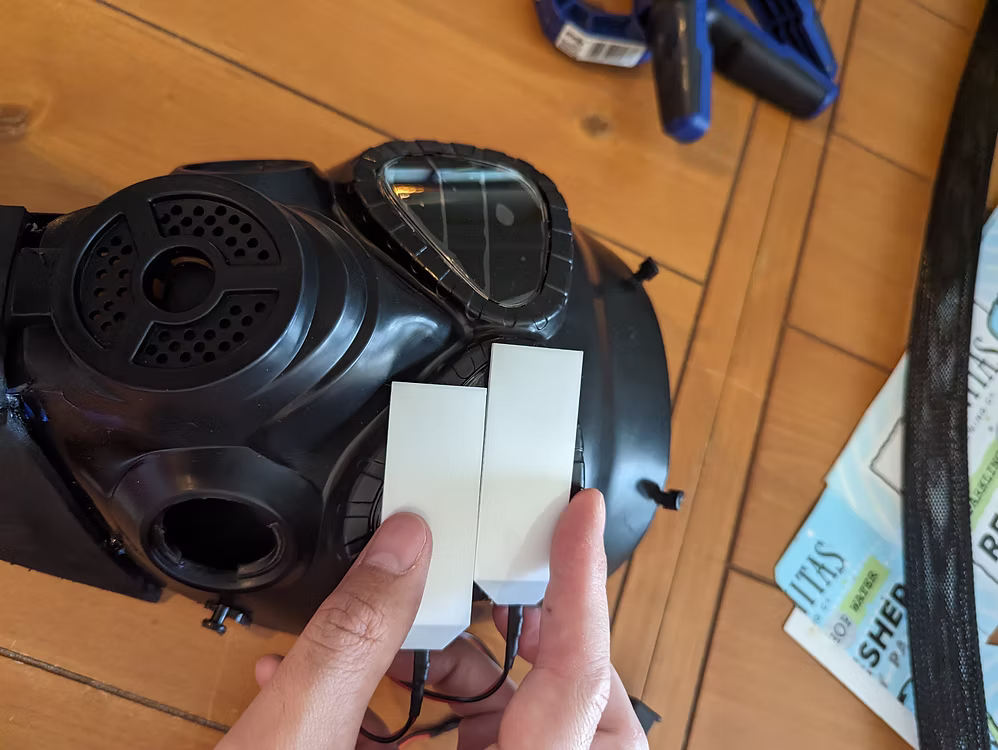
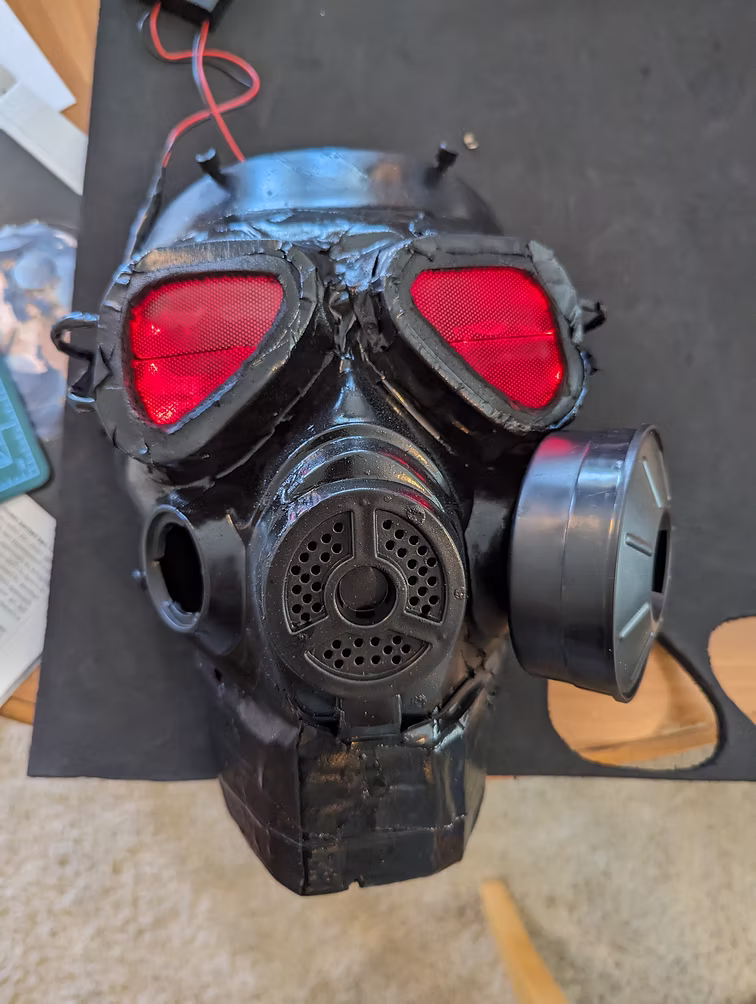
Before and after - adding the iconic red glowing eyes
Pip-Boy Development
In the meantime, my duster and helmet arrived and both fit just fine. I had about two months before Halloween and I really wanted a Pip-Boy... So I started with RPi Pico WH. I figured I was going to power the helmet box with its own portable power bank, so one more couldn't hurt when it came down to it.
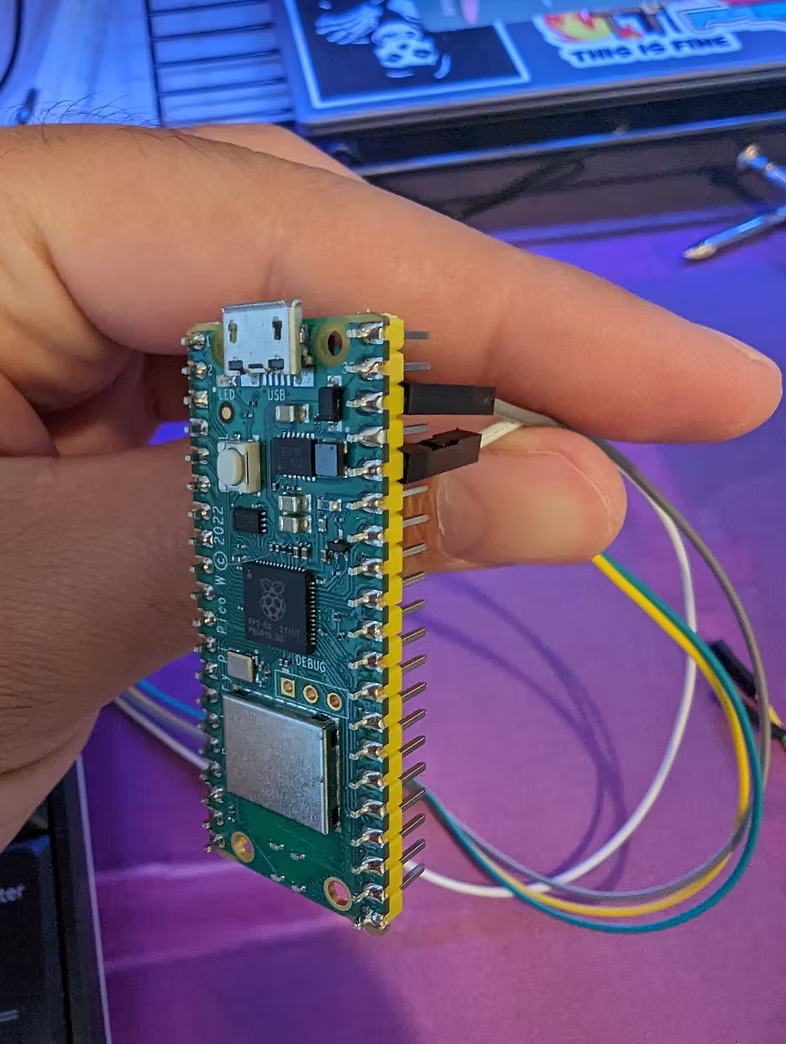
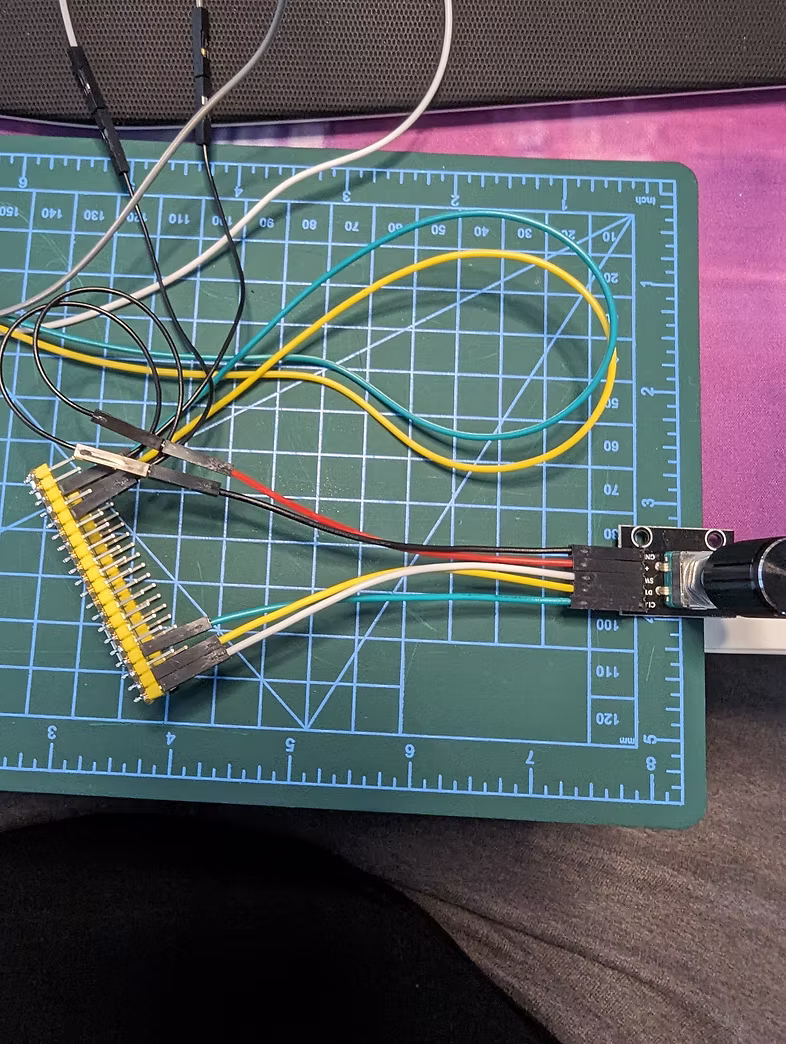
Early Pip-Boy development with Raspberry Pi Pico and rotary encoder
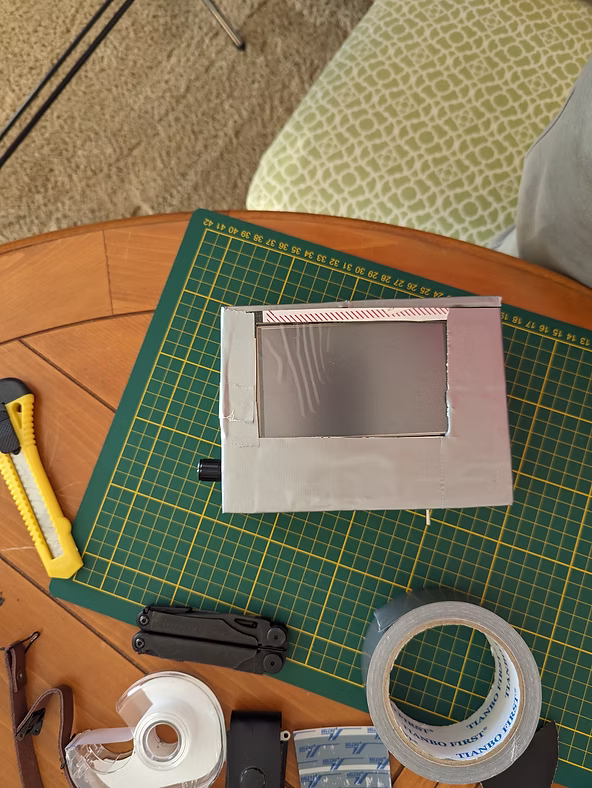
The Pico is a GREAT device, and it was easy to jump into Circuitpython with some additional peripherals and sensors. The biggest piece of the Pip Boy is arguably the screen, so I spent about $70 on a large-ish screen and got it working right away.
Success! Getting the main Pip-Boy screen working
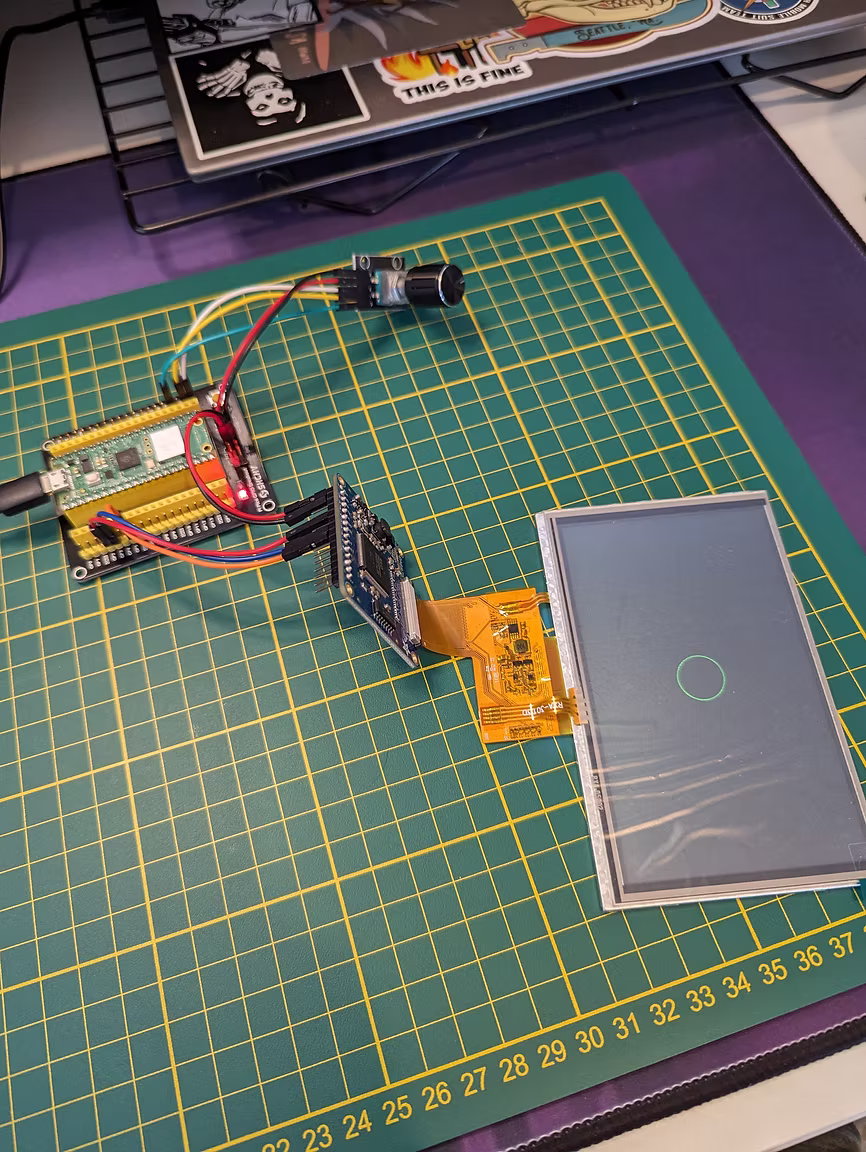
While I was delighted that I could make the screen do things with the rotary encoder, it turns out that the Pico is somewhat limited in flash memory size (2 MB, with 1.6 MB of usable space). I needed lots of different libraries to make the sensors work, and it just didn't have enough room on it to reliably run. I decided on the RP2040 board from Adafruit. It has 8 MB of flash memory, plenty to hold everything I need and a slightly higher performance boost for under $10.
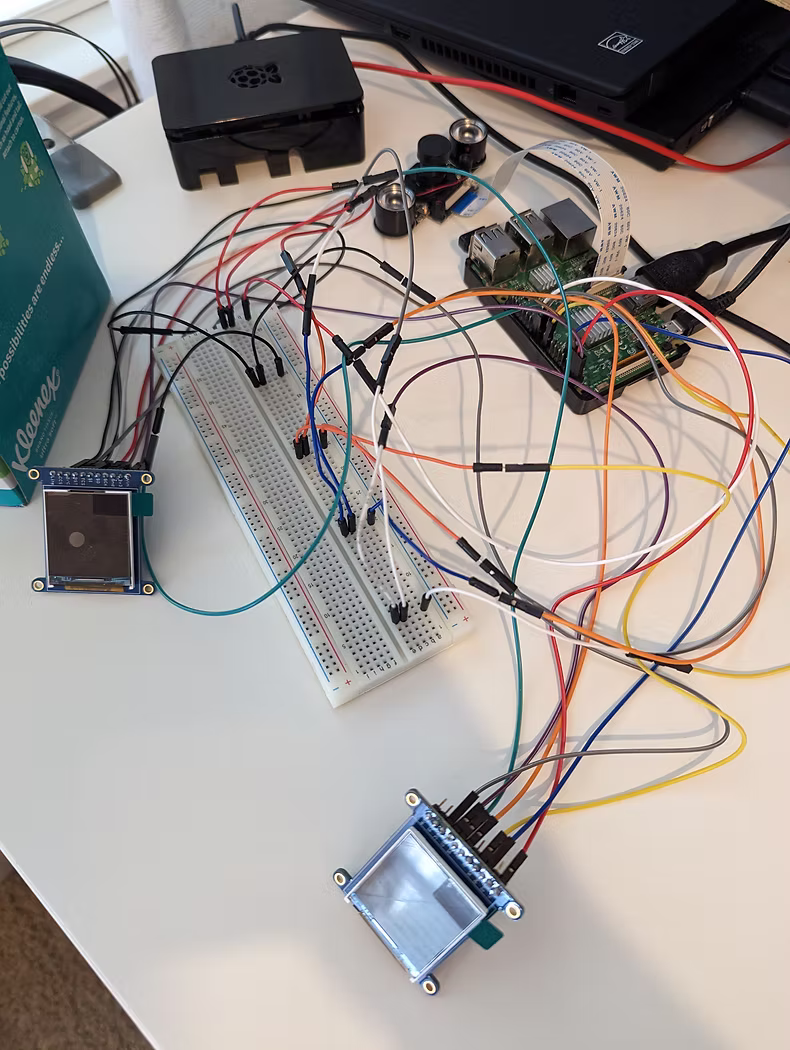
Screen Development
Narrowing down some choices, I needed to determine how many screens and what sort of control over them I wanted. The Pip Boy is controlled with a multi-function rotary encoder that lets the user traverse a complex menu and select different things. While neat to do, I was running out of time and had to go with a flat screen structure, just showing sensor read-outs and other bits on one of four different screens.
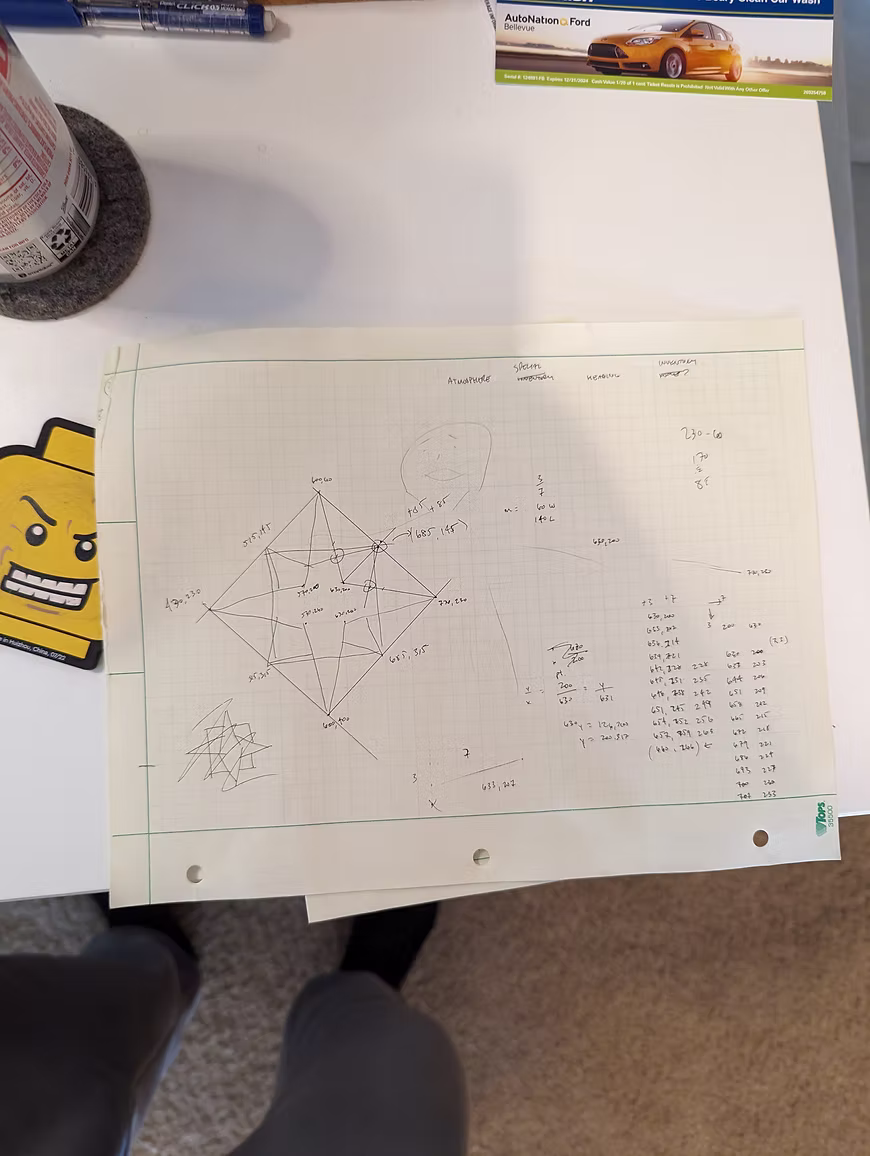
Hand-calculated pixel mappings for compass star and the resulting navigation screen
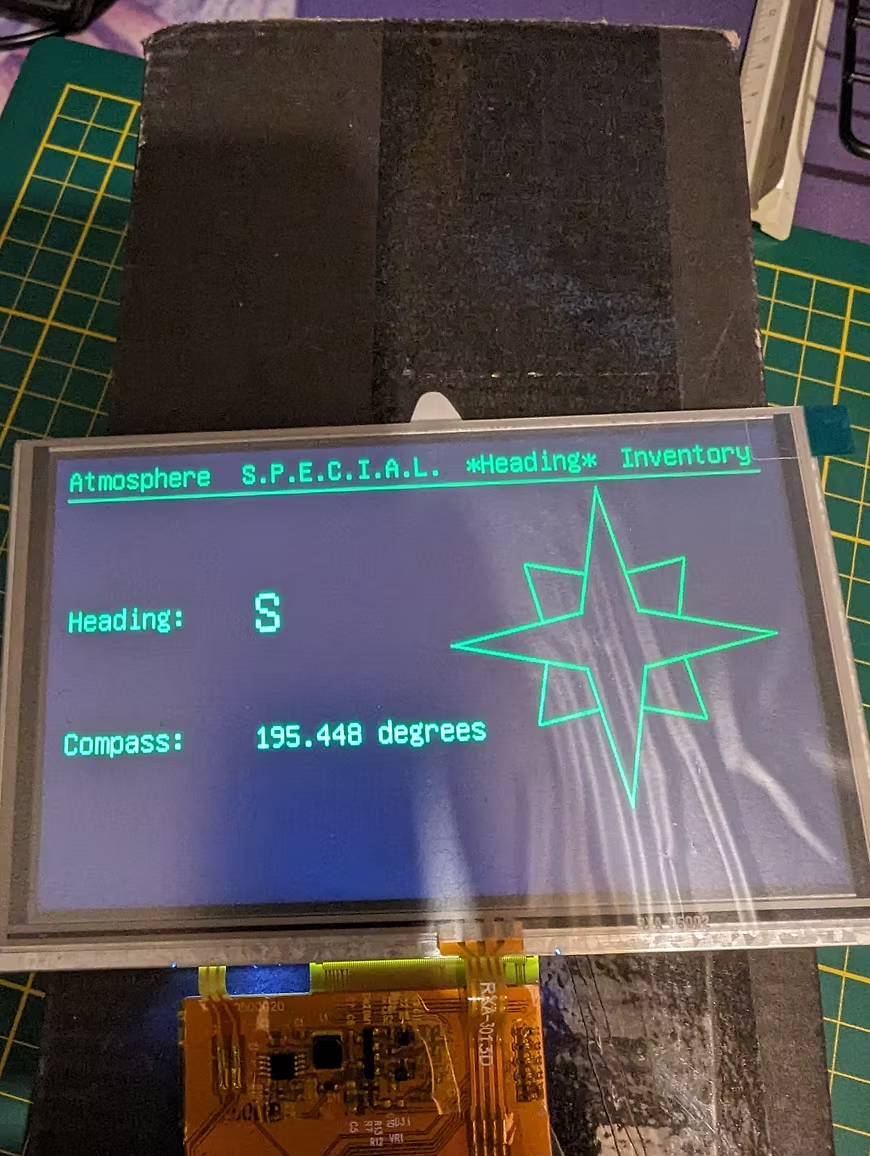
The numbers on the left are pixel mappings I used for a compass star, drawn one line at a time. On the right, you can see the compass reading in degrees, plus the heading. I added a SPECIAL screen (from the game) and was able to include a small .jpg image directly from the game.
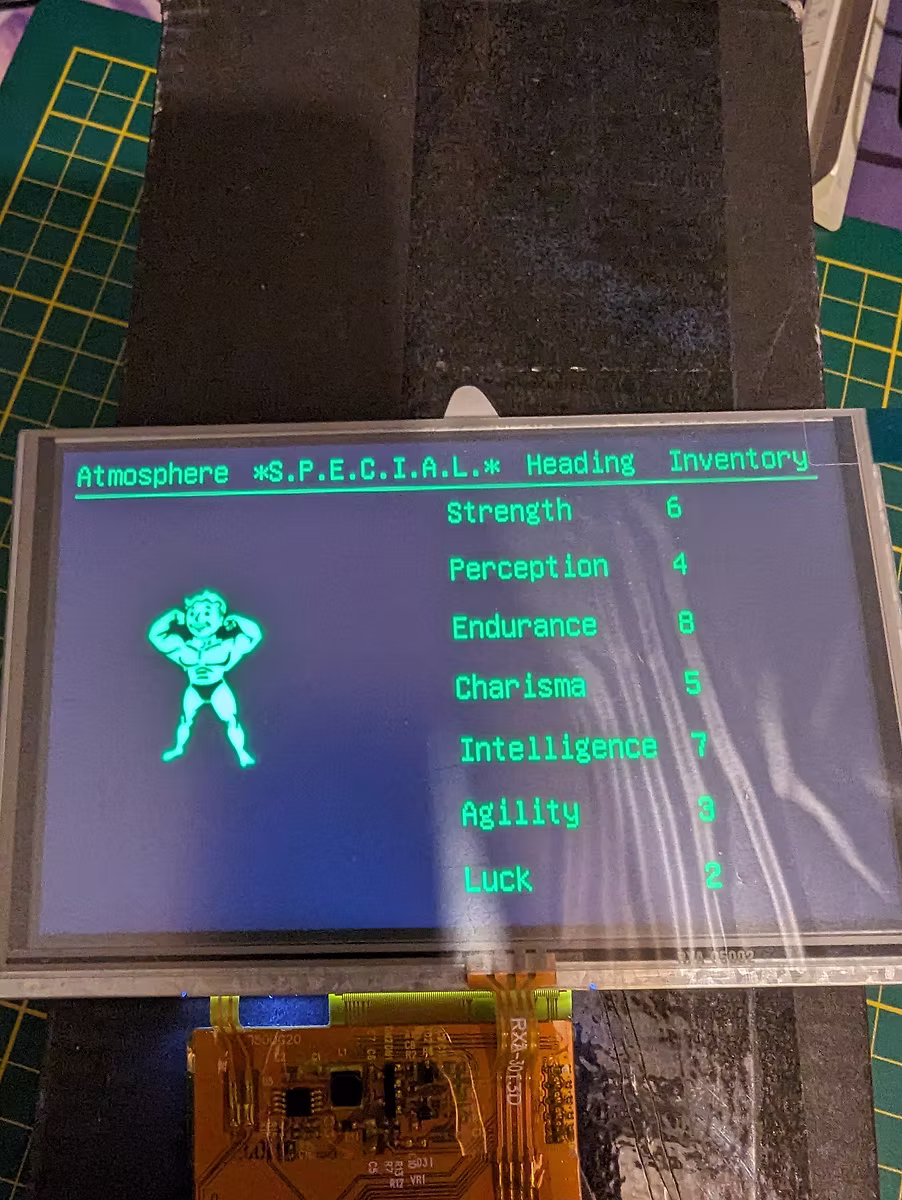
The SPECIAL screen - directly from the game for authenticity
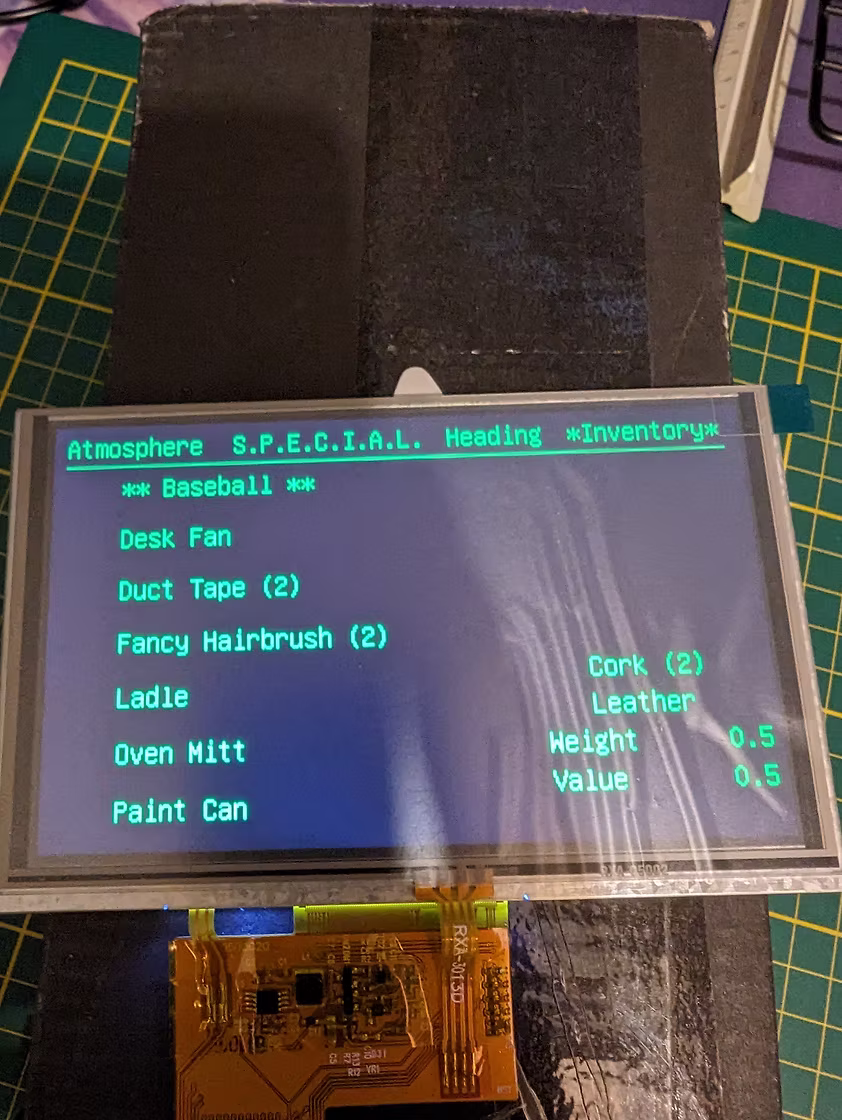
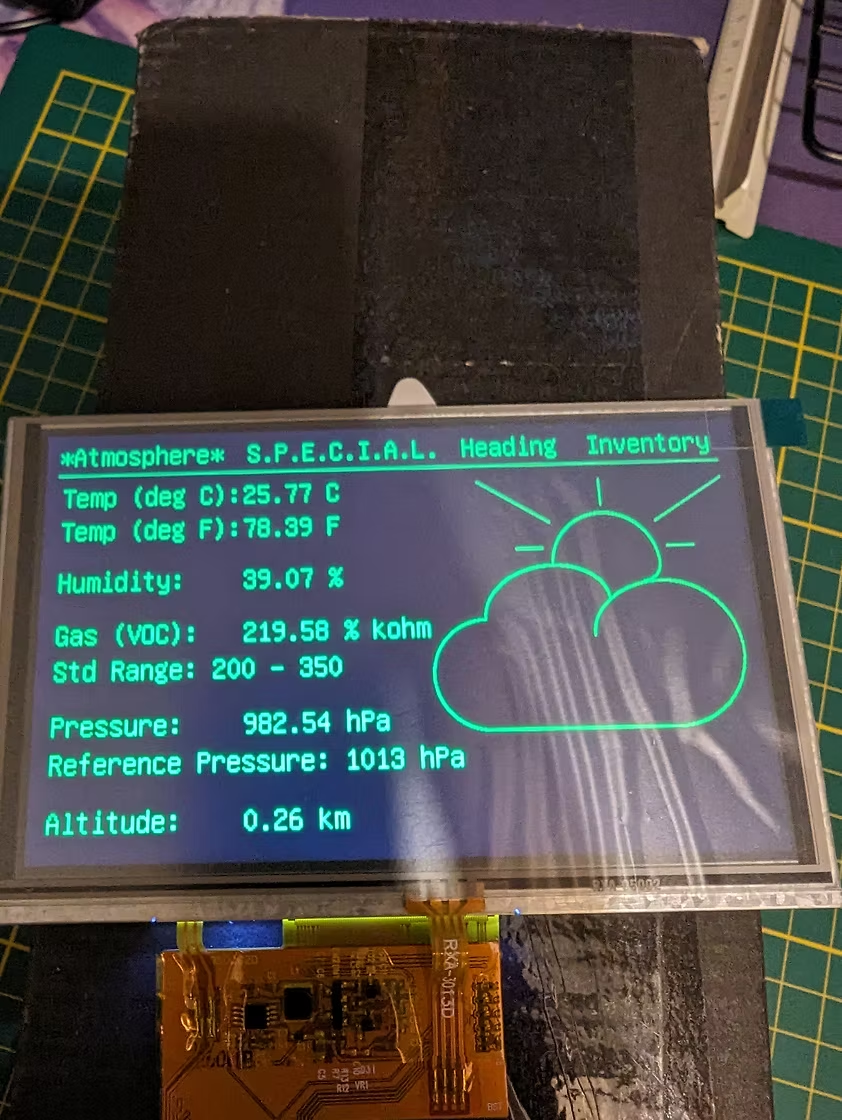
Additional screens: Inventory and Atmosphere (with hand-drawn cloud and sun)
Final Assembly
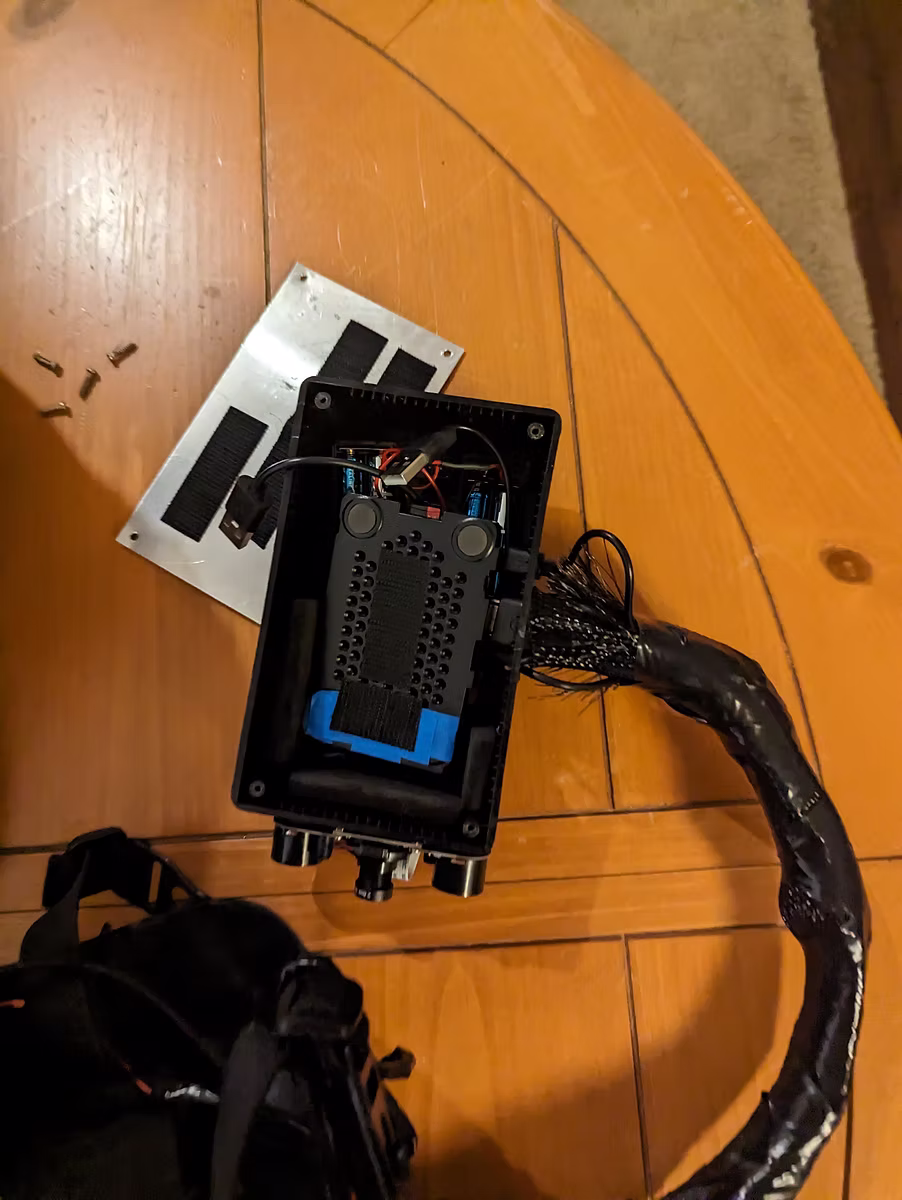
I ended up going a different direction than a portable power pack for the power source. Also from Adafruit, the battery available for this board is remarkable. Rechargeable and robust, it was a simple add that I was really happy I went with. I also added a few other bits including a toggle on/off switch and some circuitry to read the battery level.
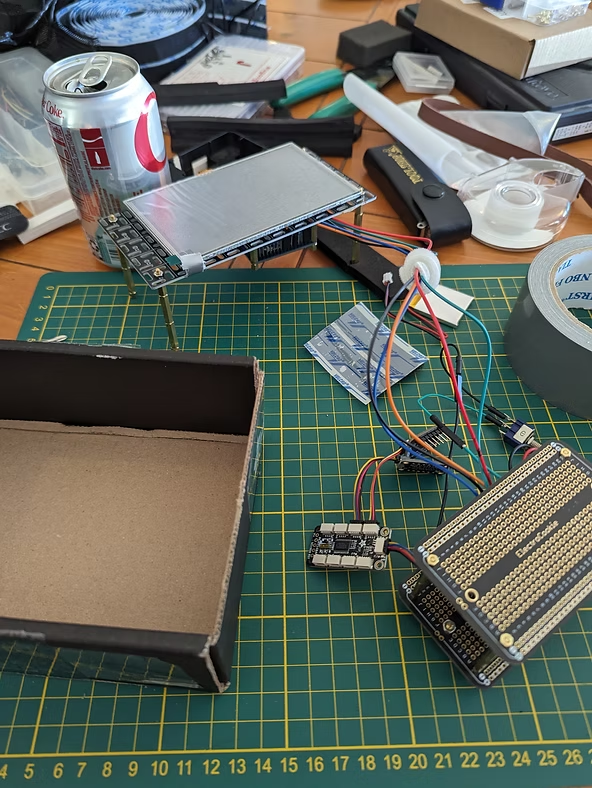

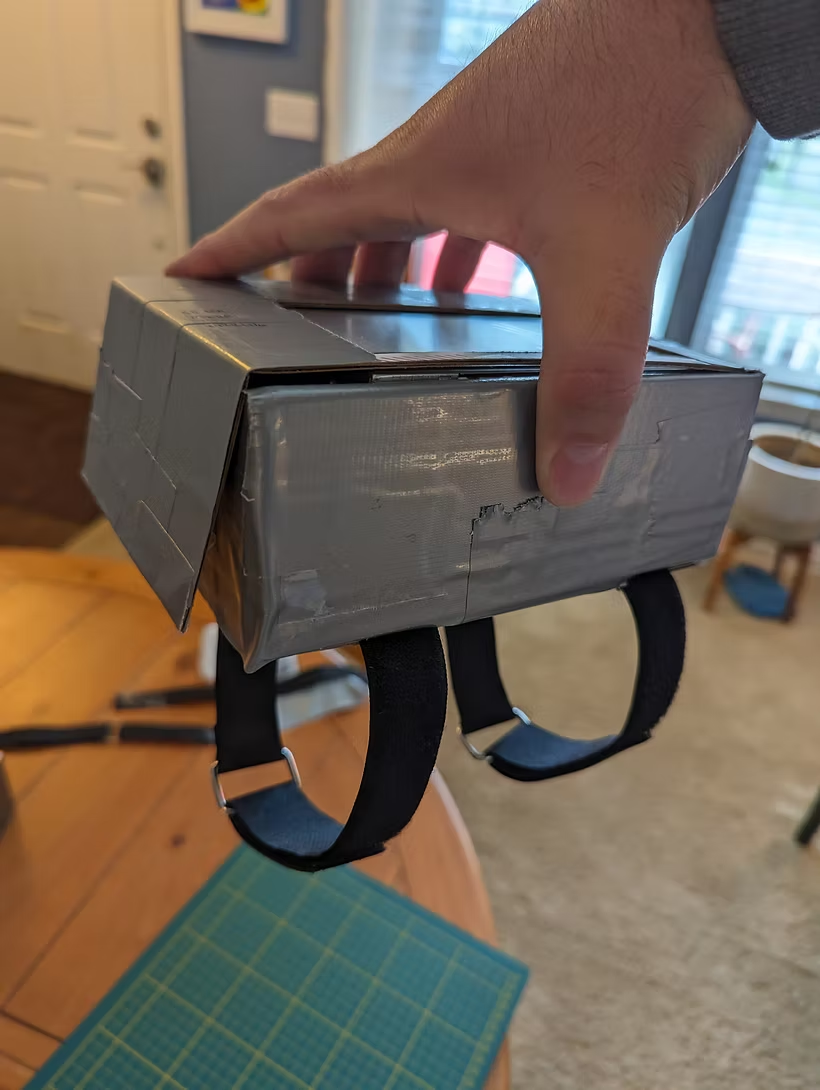
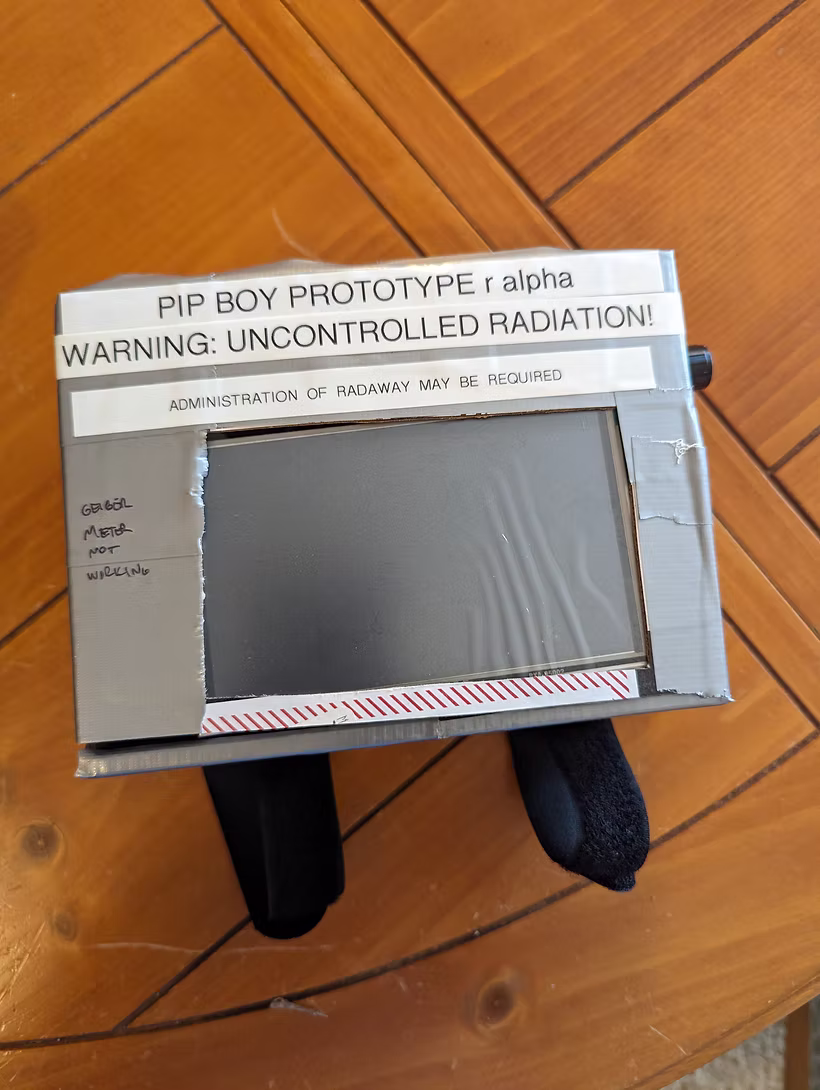
Pip-Boy packaging progression from components to final wearable device
The final configuration included an Adafruit RP2040 board, a rechargeable battery, an IMU chip that included a magnetometer for heading and direction (after calibration), and a BME680 chip that added temperature, pressure, and some other bits. I added a battery level indicator to finish things off.
Helmet Integration Challenge
The form factor problem came back to bite me on the last step. It was October 30th and a half and I needed to stuff everything into an oversized box that I bought for the helmet mounted gear. I also didn't have a solid plan for attaching the box to the side of the helmet...which is too nice to drill through.
I ended up ditching the metal ear and magnets and went with a foam block attached to the side of the helmet. I formed it to the helmet and added velcro to the outside of the form to form a "platform" for the bottom of the box to stick to it. It worked beautifully!
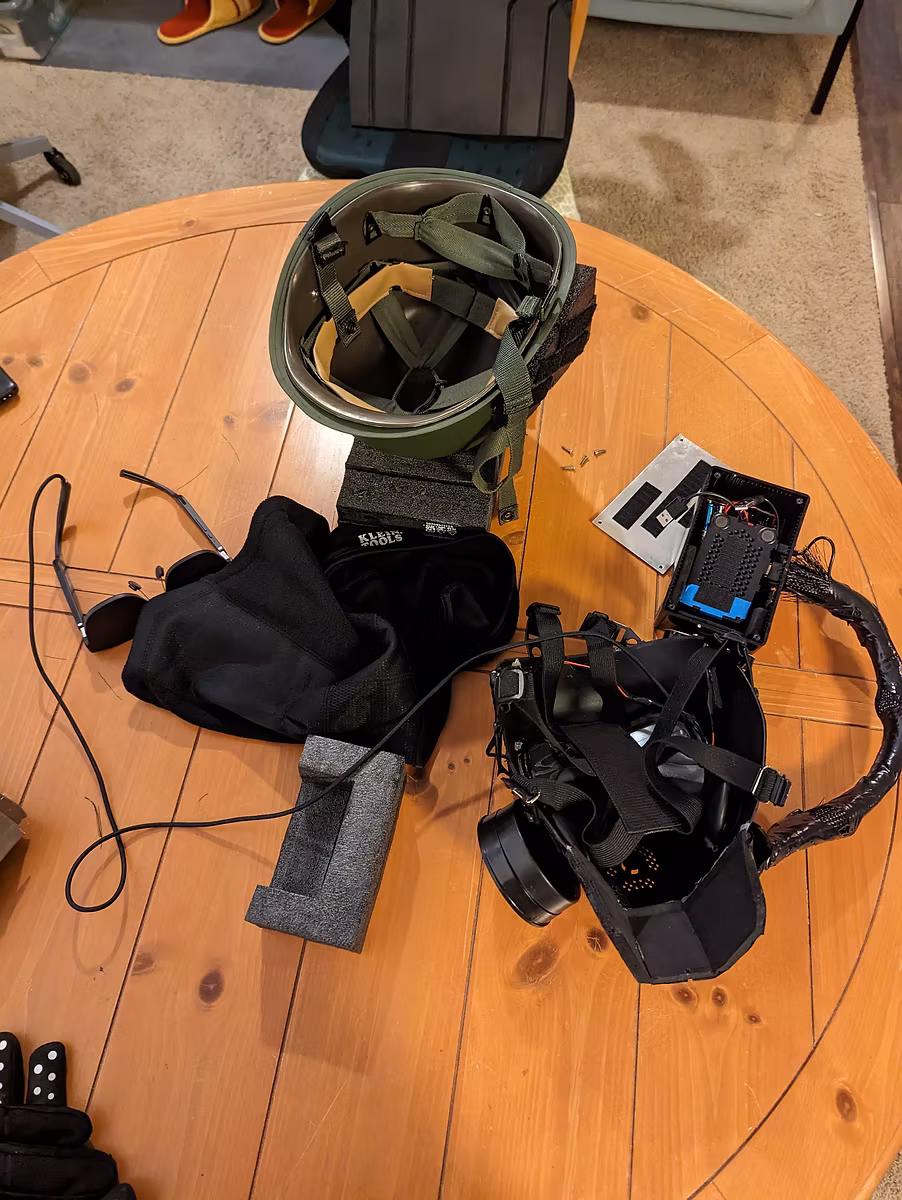
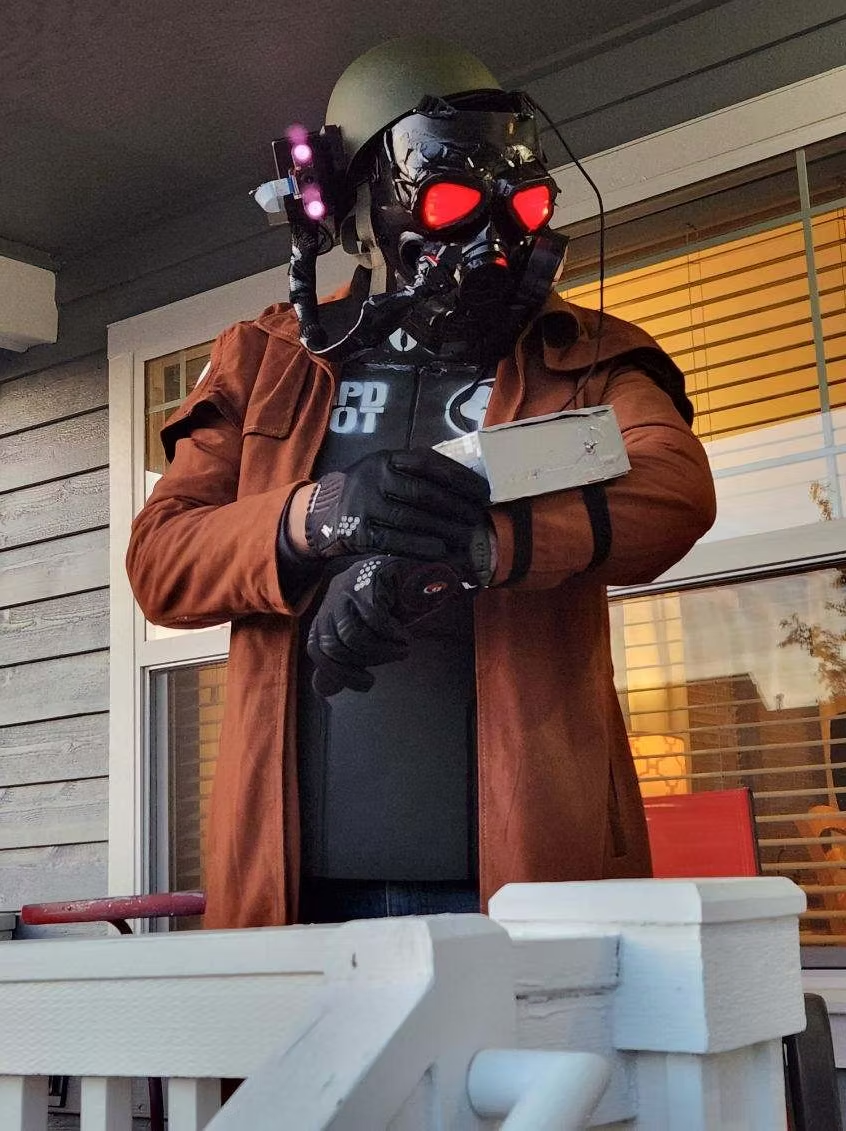
Final helmet setup - looks insane but works perfectly!
This looks insane, I know. I would absolutely love a re-do and a few hundred more dollars to get it to a little more respectable shape but I am so delighted with how it turned out.
Results
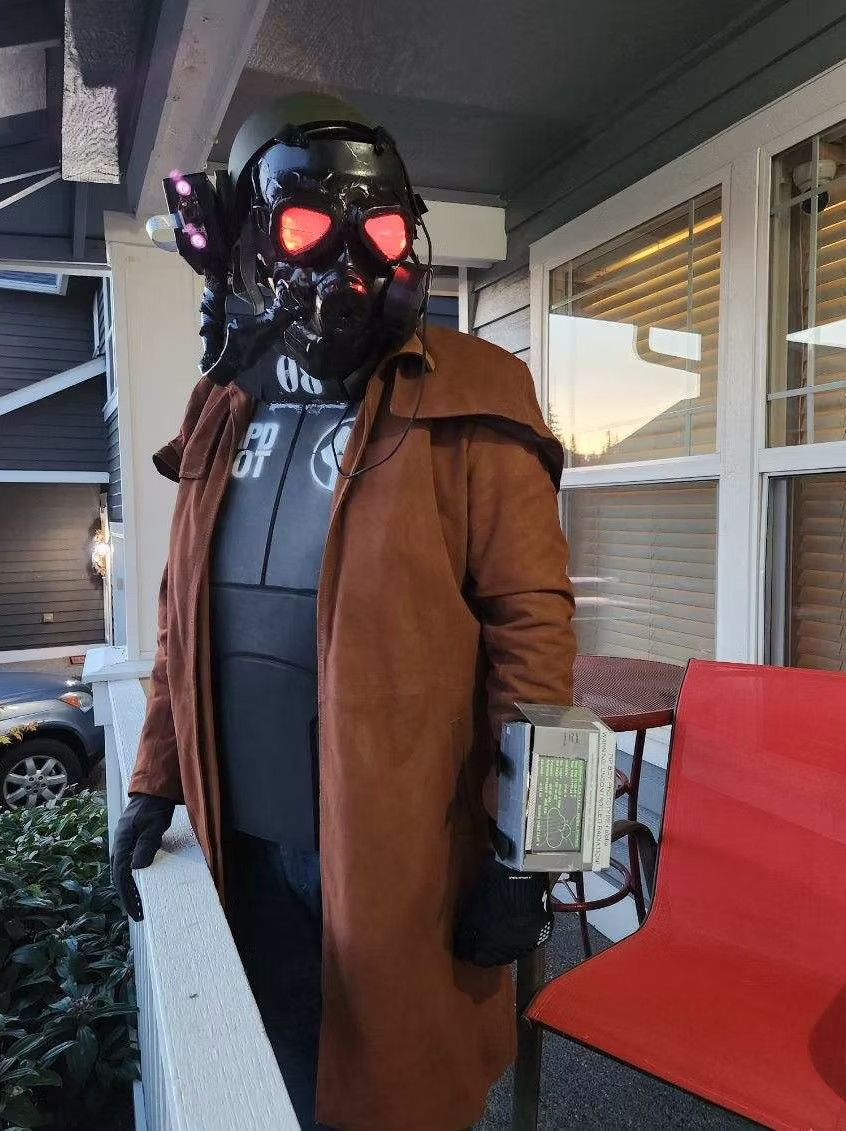
Approximately 1000 cans of Diet Coke after I started, I made the deadline of Halloween! There are some obvious flaws, the most obvious in my mind is the facemask-helmet overlap. I had to add padding to the mask to make room for the glasses and the helmet only goes out so far.
You can see the spray paint on the chest piece that I wasn't able to show earlier...that turned out well. The stencil was easy to make and applying a heat gun to the EVA foam before painting made the difference in the final look.
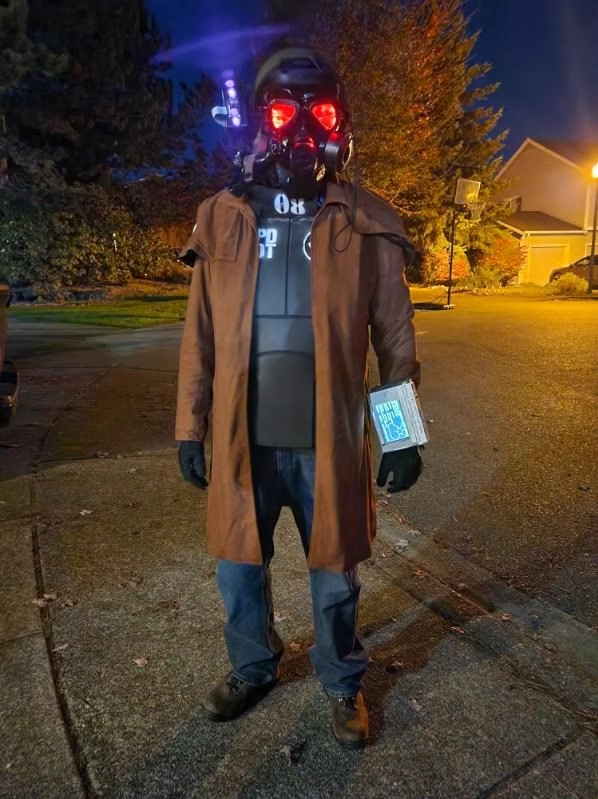
The complete Fallout New Vegas costume - 10 months of work culminating in Halloween success!
Lastly, my wife deserves a huge shoutout. Thank you for putting up with a totally destroyed living room for so long!